Sunday, September 15, 2013

Baby Boy Nursery Art

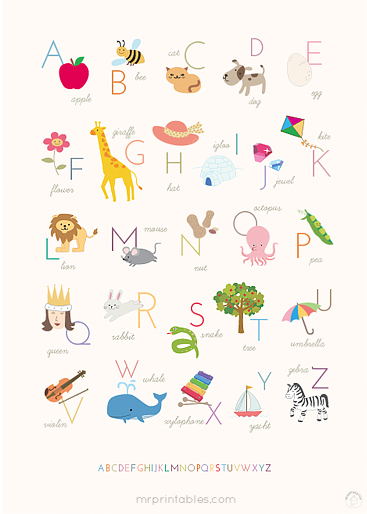
We've been working hard! First, we made a baby, then we found out it is a boy!! Now the transformation of a formerly pink bedroom is underway. Today I want to share some art that I created for the nursery. The bedding is Alphabet Soup by Cocolao, it is a cute mixture of animal and alphabets. 
I started trolling Pintrest for nursery art and alphabet prints. Here is a taste of what I found: 


For more inspiration, check out my Nursery Inspiration board on Pintrest.

Some of these canvases are $80-$100. I spent a fraction (and I mean a small fraction!) of that on canvases and paint, the rest is paper from my stash and images cut out with my handy-dandy Cricut machine! Here is what I came up with:


The letters are Don Juan by Cricut. I chose these because of their uni-case and rounded, less formal design. The characters are from a variety of cartridges that I have in my stash: Zooballoo, Everyday Paperdolls, and Paper Doll Dress Up to name a few. The paper for the letters is Cogsmo by Cosmo Cricket (straight from my stash). The paper for the characters all came from my scrap bin.


Tuesday, January 29, 2013

Storage: Stamps


One of the major things that I changed when I completed my Craft Room re-design was my stamp storage. I used to store my acrylic stamps in CD Jewel cases. I had a nifty box that perfectly fit the jewel cases, with a drawer underneath for acrylic blocks.
Well, when I got my Expedit shelf, it was clear that storage system would not be ideal. It just didn't fit. So (over time!) I've converted all of my acrylic stamps into a binder storage system. 

I got the binder from work, it was the largest one in the closet! The rings are 5". A pencil case perfectly fits my acrylic blocks.

 Each page protector has a transparency sheet and a white piece of paper in it. The stamps stick very well to the transparency. The page protectors are heavy duty, and have a flap at the top that folds over. I think I got these at Staples, but I've had them for a long time.

So far, I am happy with the change. The only downside is that the binder is very heavy and cumbersome. And I can't just pick one set of stamps to take along if I am traveling (although I could take the page protector out of the binder). Luckily the binder is stored at desk-top level, so I can just pull it out and open it up.


Monday, January 28, 2013

Storage: Paper

My paper has lived in this wonderful filing cart ever since I had a need for storing paper! I got the cart way back when I worked from my home office, and kept it when I was laid off!! It is perfect for 12x12 papers because it has an open top. I use Cropper Hopper dividers to organize the paper, which also keeps them from bending. The patterned paper is sorted by manufacturer, and line. Any large scraps or flat embellishments that match the paper, stay with the paper.
In the lower bin of the cart is my chipboard and vinyl. I store my solid cardstock in one of the Expedit shelf kubies in order by color.

Sunday, January 27, 2013

Storage: Ribbons, Flowers and Buttons! Oh my!

RIBBON:
My ribbon is stored in a plastic baggy system that was originally marketed for embroidery floss. The little baggies have holes in them and were strung on a ring. When I re-designed my room, I discovered the baggies perfectly fit into one of the black trays that I got at Michael's. So, I took them off the ring, and strung them onto dowel rods, and placed them in the bin. Although this system is no longer for sale, it could be easily recreated using snack or sandwich size baggies and a hole punch!

FLOWERS AND BUTTONS:
This may be one of my favorite organizational/ design elements that I've come up with. My flowers and buttons are stored in magnetic tins, which are stuck on this circular black magnet board. They are arranged to resemble the color wheel. This is not something that is new to my re-design. I've had this for a few years, and love it. All of my non-crafty friends think it is an awesome decoration, and my crafty buddies wish they had one!
All of the supplies for this storage system were purchased at IKEA. The tins are from the "Grundal" kitchen storage collection, and the magnet board was in the home organization section.

Saturday, January 26, 2013

No-Sew Napkin Valance

One day, I came up with the smart idea to hang-dry my reusable snack baggies in my kitchen window. The afternoon sun was streaming in, and the window was open. So I grabbed an extra curtain rod, and strung them up. They were dry in no time! I stepped back to look at my creativity, and thought, "Hey- that would be kind-of a cool valance!"

The idea was born.... to use cloth napkins as window valances!! Now THAT is genius!

Recently, I've gotten addicted to online yard-saleing. There is a local group on Facebook that I belong to. You just never know what you will find, like cloth napkins that perfectly match your kitchen paint color! I got 11 napkins for $8.


First, I hung them up to see what they would look like, and decide on a "way" to hang them (diagonal, straight, etc). To hang them, I simply draped them over the curtain rod.

Then I ironed them. To create a tailored look, I folded the corner under that would be at the edge of the window, and pressed it.
To make it more secure, I used straight pins at the tip of each napkin as well as at the top of the napkins, right under the curtain rod (I put three or four pins across the whole window).
The results are stunning, if I do say so myself!! They took about 45 mins of work, and can be easily and inexpensively changed!


Friday, January 25, 2013

Craft Room Re-design (Part 7): The Details

The biggest change in the room (besides the color palate) is my conversion from "if you see it, you will use it" mentality to, "neat and tucked away" mentality. Going into this project, I knew I had to create a space that would serve dual purposes:

  1. My Scrapbooking space (play)
  2. My office space (work)
  3. DH's fly tying (manly-ish)
I had to create a space that would work for all of those purposes. A place were I can play AND work, as well as a comfortable place for DH's craft. I decided to tuck things neatly away, because I knew I would not be able to get work done with my scrapbooking, "play", things out and about!

I bought a bunch of these wonderful black bins from Michael's (bonus- they were on clearance!). I took every embellishment off my clip-it-up and placed it into these bins. All my alpha stickers are together, and then everything else is pretty much sorted by size. Like things are paper clipped together within the bin.
DH added shelves into my Expedit using particle board and wooden dowels in order to accommodate the bins. My goal was to not have the shelves be too crowded, but at the same time, I did not want to waste space.

Also in these bins are my adhesives, and everything that was in those small sterelite drawers of old. The one all the way on the right houses my inks and stamping supplies. Under it is a binder, full of stampy goodness!


Here is the smaller Expedit, to the right of the desk. Again, DH installed additional shelving. These larger bins host the things that were in the larger sterelite drawers: punches, Cuttlebug, and odds and ends.

This area is the dual-purpose desk. I will be working more hours from home come swim season, so I needed to create a dedicated area for that. It also continues to be home for my Cricut, and related supplies.

And last, but not least! DH's fly tying desk (which needs an organizational overhaul in and of itself!). It is a student sized antique roll top desk, so luckily it can be closed and the chaos just disappears!


Before you go, some other design elements I love... 
1. The french memo board. I doctored up this clearance item to match my room. It is holding my inspiration paper right now, but will hold my latest scrapbook page for me to enjoy, and also has pictures of my favorite people in it (just realized there is no picture of my J... will have to fix that!).
2. Turquoise mug pen holders: These are beautiful as well as functional. They really bring the turquoise from the peg board into another part of the room. The rod they hang on is from Ikea.

I will continue to post more specifically about the organizational elements in the room, so stay tuned!

Thursday, January 24, 2013

Craft Room Re-design (Part 6): The Reveal

The big day has finally come!! Time to show off my hard word re-designing my craft room. I switched from re-organize to re-design because truly, it was the color scheme as well as the lack of organization that was bothering me.

Without further adieu..... TA-DA!!!

Oh!! It's so clean, so neat, so wonderful!! I hardly want to touch it! 

And incase you need reminding, here's what we started with:
BARF!! Haha.

You can clearly see that getting rid of the yellow peg board and introducing a soothing palate: Red, Turquoise and Orange-Yellow makes a huge difference!!
As you can see, some of my old, pink, stuff remains: my ATG gun, and my tool tote, as well as my Ott light. Those are things I can not live without, even though they stick out like sore thumbs!!

Tune in next time, when I will highlight a few other things that I did to bring sanity to this room.

Friday, January 18, 2013

Craft room reorganization (Part 5): PURGE!!

Part of every organization project involves purging! It is good to comb through your things and get rid of things you are not using or just don't like!
Here are my purge piles. I will be selling things on two Facebook groups, so if you see something you like, check these two places:
https://www.facebook.com/groups/208441695924123/
https://www.facebook.com/groups/HarleysvilleYardSale/


Thursday, January 17, 2013

Craft Room Reorganization (Part 4): Score!!

I believe there is a fine line between form, function and style. I want my room to be functional, but also be a pretty and appealing place to be.
So- I've been shopping for organizational tools (bins, boxes, etc), as well as pretty things to liven up the space. And when something pretty can also be functional, that is a bonus!
Today was a great day in the retail world! I scored 9 storage bins at Michaels on clearance for $4 each! They fit perfectly into the Expedit kubies. I also stopped in to Home Goods and found this very pretty glass container. It has the perfect colors on it to match my room!! Although it was $15, I just could not leave it there! I stuffed packing paper into it for now. I'm not sure what function it will serve just yet.... just had to share it with you!

Monday, January 14, 2013

Craft Room Re-Organization (Part 3): Turquoise and Chevron

I mentioned in Part 1 of this organizational journey that the color I chose for my pegboard was hideous. Yes, it's true, I don't know what I was thinking!
So- where to put that splash of turquoise is obvious!! And how to do it? I decided to embrace the oh-so-trendy chevron pattern.
I tapped off the area around the pegboard and painted a base coat of off-white paint that I had leftover from another project. Then, I contemplated how big I wanted the chevron pattern to be, measured it out, and made my markings with pencil.
The pegboard is 4 feet long by 3 feet high. I measured every 16" so that there would be three chevrons across (can 'chevron' be plural?!). Then I measured down and marked every 6", for the width of the chevon.
Then I started taping using Blue Painters Tape with Edge Lock. It is more expensive, but as you'll see it is totally worth it!

I meant to take a picture before I started painting, but in my excitement, I totally forgot! I will also admit that the pattern started to mess with me, and I had a major brain fart. I had to call in DH for back-up assistance. Once I recovered, painting commenced, and finished up rather quickly.

Ohhhhh! How I HATE waiting for paint to dry. One of the worst things in the world. Not as bad as packing up the camper to come home from an awesome weekend away. I digress....


VOILA!!!


The finished pegboard! The perfect pop of Turquoise! Although it is more blue than green, it is much more turquoisey in person than in this picture. The color is Deepest Aqua by Glidden. I got a sample size from Home Depot.

Tune in next time, when the actual organization gets under way (hmmmm.... I guess I need to figure that part out!)

Sunday, January 13, 2013

Craft Room Re-Organization (Part 2): Color Inspiration

Now that I have a clean slate to work with, I decided to come up with a new color scheme. Since I am not allowed to change the color of the brick red walls in the room (DH would have my head!), I pulled out a color wheel and started thinking about what colors would look good with brick red.

I also read through this great tutorial on the HGTV website for a refresher about how the color wheel works. Simple. Sweet. Love it.
The first thing that became obvious: my favorite color -pink- was NOT going to work. *SIGH*

Reminder- this is what I'm working with!


Ok- brick red! GO! I decided to use a triad of color, a twist on the primary colors: red, turquoise and yellow-orange. Well, I've got my red walls. My yellow-orange is represented by the Expedit shelves and tabletops. I just need a splash of turquoise (and I know just where to put it)!

Next, I went to my patterned paper stash and, much to my pleasure, I found many papers that I already owned which incorporated this color scheme. This is a good sign- I must already like it!!


I chose just one sheet of pretty paper for my inspiration, from my favorite manufacturer (My Minds Eye), and placed it on this french memo style board that I found on clearance at Michaels. I love the board because it has a place for 12x12 paper, so I can display my latest scrapbook page. I also doctored it up a bit by coloring the buttons and adding some cute twine bows.


Tune in next time to find out WHERE I will incorporate the Turquoise!!


Saturday, January 12, 2013

Craft Room Re-Organization (Part 1): The Problem

Every year it happens.... I get the urge to organize and "nest" in the winter before I go back to work (I work seasonally at a swimming pool company). This year I have cleaned out closets and re-arranged a few cabinets in the kitchen. But my BIG project is re-organizing my craft room. Well, ok, it never really was organized since we moved (2 years ago!).

When we moved in to our new house, my scraproom got upgraded from attic with leftover random furniture to perfect nook in the finished basement with real furniture! I got my beloved Ikea Expedit bookcase with desk attached!! (Note that these pics were taken before I unpacked any of my scrappy stash)


Recently, MY scrap room became THE craft room, with the addition of DH's fly-tying desk. It was moved out of J's play area to make more room for him! (It is my hope that DH and I can spend QT together while working on our own projects.)

The furniture got shifted around to make space. And we ended up with this lovely mess! It may not look that bad to some of you, but it just did not make me happy. Firstly, I hate the wall color (chosen by previous owners), but that I am not allowed to change. Secondly, not one of the kuby's in my beloved Expedit is functioning to it's potential. Third, the color I chose on the pegboard is horrendous!
So- I decided to start the transformation with a clean slate! I pulled everything off the shelves and out of the nooks and crannies. I sorted through things and made a "keep" pile, "sell" pile and filled a trash bag as well!
Here is the "keep" pile. Oh yeah, and behind that is DH's fly tying desk. hehe. Good thing he's busy with hunting right now, and not thinking about fishing ;) Tucked back in the bathroom is my "sell" pile, which is ever growing!

Well, I think that is enough for today!! Stay tuned for Part 2 of the transformation tomorrow..... what to do with these red walls?!

Friday, January 4, 2013

Wine Glass Decor

Here is a very simple and fun way to use those wine glasses gathering dust in your china closet (or cheap ones, like these, I found at the thrift store!). I created these for my Women's Club holiday dinner. There was one at each place setting, so they acted as table decor and a party favor!
I used glittered pinecones, holly picks, and ribbon from JoAnn Fabric. To make it easier for transporing to the restaurant, I hot glued the pinecones and picks to a black cardstock circle, and placed them under the glass. Voila!! Simple and elegant, this project can be adapted for any season!